Installing and configuring CMAN is a trivial activity, but having the steps in one place is better than reinventing the wheel.
Prepare for the install
Download the Oracle Client 19.3.0.0 in the Oracle Database 19c download page.
Choose this one: LINUX.X64_193000_client.zip (64-bit) (1,134,912,540 bytes) , not the one named “LINUX.X64_193000_client_home.zip” because it is a preinstalled home that does not contain the CMAN tools.
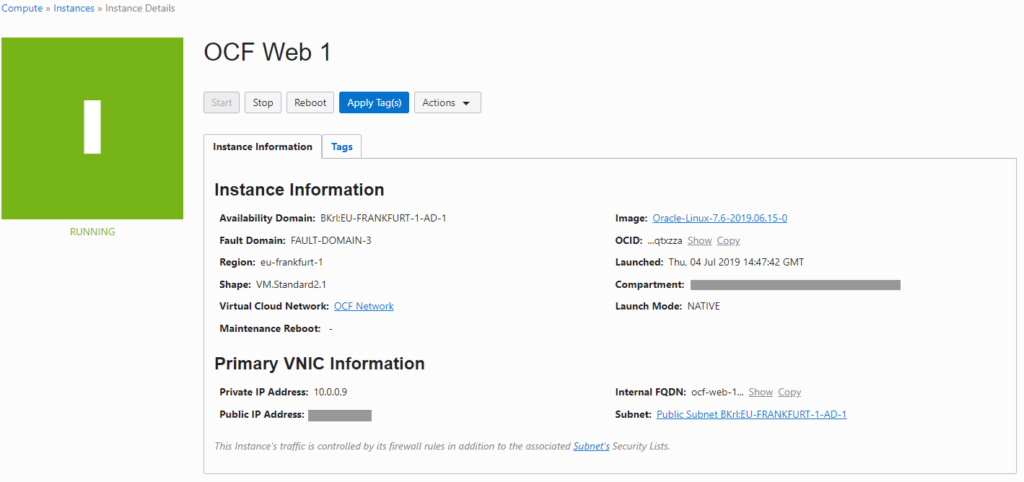
Access the OCI Console and create a new Compute instance. The default configuration is OK, just make sure that it is Oracle Linux 7 🙂
Do not forget to add your SSH Public Key to access the VM via SSH!
Access the VM using
|
1 |
ssh opc@{public_ip} |
Copy the Oracle Client zip in /tmp using your favorite scp program.
Install CMAN
Follow these steps to install CMAN:
|
1 2 3 4 5 6 7 8 9 10 11 12 13 14 15 16 17 18 19 20 21 22 23 24 25 26 27 28 29 30 31 32 33 34 35 36 37 38 39 40 41 42 43 |
# become root sudo su - root # install some prereqs (packages, oracle user, kernel params, etc.): yum install oracle-database-preinstall-19c.x86_64 # prepare the base directory: mkdir /u01 chown oracle:oinstall /u01 # become oracle su - oracle # prepare the Oracle Home dir mkdir -p /u01/app/oracle/product/cman1930 # unzip the Client install binaries mkdir -p $HOME/stage cd $HOME/stage unzip /tmp/LINUX.X64_193000_client.zip # prepare the response file: cat <<EOF > $HOME/cman.rsp oracle.install.responseFileVersion=/oracle/install/rspfmt_clientinstall_response_schema_v19.0.0 ORACLE_HOSTNAME=$(hostname) UNIX_GROUP_NAME=oinstall INVENTORY_LOCATION=/u01/app/oraInventory SELECTED_LANGUAGES=en ORACLE_HOME=/u01/app/oracle/product/cman1930 ORACLE_BASE=/u01/app/oracle oracle.install.client.installType=Custom oracle.install.client.customComponents="oracle.sqlplus:19.0.0.0.0","oracle.network.client:19.0.0.0.0","oracle.network.cman:19.0.0.0.0","oracle.network.listener:19.0.0.0.0" EOF # install! $HOME/stage/client/runInstaller -silent -responseFile $HOME/cman.rsp ORACLE_HOME_NAME=cman1930 # back as root: exit # finish the install /u01/app/oraInventory/orainstRoot.sh /u01/app/oracle/product/cman1930/root.sh |
Basic configuration
|
1 2 3 4 5 6 7 8 9 10 11 12 13 14 15 16 17 18 19 20 21 22 23 24 25 26 27 28 29 30 31 32 |
# as oracle: mkdir -p /u01/app/oracle/network/admin export TNS_ADMIN=/u01/app/oracle/network/admin cat <<EOF > $TNS_ADMIN/cman-test.ora cman-test = (configuration= (address=(protocol=tcp)(host=$(hostname))(port=1521)) (parameter_list = (log_level=ADMIN) (max_connections=1024) (idle_timeout=0) (registration_invited_nodes = *) (inbound_connect_timeout=0) (session_timeout=0) (outbound_connect_timeout=0) (max_gateway_processes=16) (min_gateway_processes=2) (remote_admin=on) (trace_level=off) (max_cmctl_sessions=4) (event_group=init_and_term,memory_ops) ) (rule_list= (rule= (src=*)(dst=*)(srv=*)(act=accept) (action_list=(aut=off)(moct=0)(mct=0)(mit=0)(conn_stats=on)) ) ) ) EOF echo "IFILE=${TNS_ADMIN}/cman-test.ora" >> $TNS_ADMIN/cman.ora |
This will create a CMAN configuration named cman-test. Beware that it is very basic and insecure. Please read the CMAN documentation if you want something more secure or sophisticated.
The advantage of having the TNS_ADMIN outside the Oracle Home is that if you need to patch CMAN, you can do it out-of-place without the need to copy the configuration files somewhere else.
The advantage of using IFILE inside cman.ora, is that you can manage easily different CMAN configurations in the same host without editing directly cman.ora, with the risk of messing it up.
Preparing the start/stop script
Create a file /u01/app/oracle/scripts/cman_service.sh with this content:
|
1 2 3 4 5 6 7 8 9 10 11 12 13 14 15 16 17 18 19 20 21 22 23 24 25 26 27 28 29 30 31 32 33 34 35 36 37 38 39 40 41 42 43 44 45 46 47 48 49 50 51 52 53 54 55 56 57 58 59 60 61 62 63 64 65 66 67 68 69 70 71 72 73 74 75 76 77 78 79 80 81 82 83 84 85 86 |
#!/bin/bash -l LOCAL_PARSE_OPTIONS="a:c:o:" Usage () { cat <<EOF Purpose : Start/stop a CMAN configuration Usage: `basename $0` -a {start|stop|reload|restart|status} -c <config_name> -o <oracle_home> Options: -a action One in start|stop|reload|restart|status -c config_name Name of the cman instance (e.g. ais-prod, gen-prod, etc.) -o oracle_home The ORACLE_HOME path that must be used for the operation (e.g. cman1930) EOF } CENTRAL_CONFIG_DIR=/ORA/dbs01/oracle/network/admin while getopts ":${LOCAL_PARSE_OPTIONS}" opt ; do case $opt in a) L_Action=$OPTARG ;; c) L_Config=$OPTARG ;; o) L_OH=$OPTARG ;; \?) eerror "Invalid option: -$OPTARG" exit 1 ;; :) eerror "Option -$OPTARG requires an argument." exit 1 ;; esac done if [ ! $L_Config ] ; then Usage eerror "Please specify a configuration name with -c. Possible values are: " ls -1 $CENTRAL_CONFIG_DIR | sed -e "s/\.ora//" | grep -v cman exit 1 fi ## if the install step was OK, we should have a valid OH installed with this name: export ORACLE_HOME=$L_OH if [ ! -f $ORACLE_HOME/bin/cmctl ] ; then Usage echo "Please set a valid ORACLE_HOME name with -o." exit 1 fi export TNS_ADMIN=$CENTRAL_CONFIG_DIR case $L_Action in start) $OH/bin/cmctl startup -c $L_Config ;; stop) $OH/bin/cmctl shutdown -c $L_Config ;; reload) $OH/bin/cmctl reload -c $L_Config ;; restart) $OH/bin/cmctl shutdown -c $L_Config sleep 1 $OH/bin/cmctl startup -c $L_Config ;; status) $OH/bin/cmctl show status -c $L_Config # do it again for the exit code $OH/bin/cmctl show status -c $L_Config | grep "The command completed successfully." >/dev/null ;; *) echo "Invalid action" exit 1 ;; esac |
This is at the same time ORACLE_HOME agnostic and configuration agnostic.
Make it executable:
|
1 |
chmod +x /u01/app/oracle/scripts/cman_service.sh |
and try to start CMAN:
|
1 2 3 4 5 6 7 8 9 10 11 12 13 14 15 16 17 18 19 20 21 22 23 24 25 26 27 28 |
$ /u01/app/oracle/scripts/cman_service.sh -o /u01/app/oracle/product/cman1930 -c cman-test -a start VERSION = 19.3.0.0.0 ORACLE_HOME = /u01/app/oracle/product/cman1930 VERSION = 19.3.0.0.0 ORACLE_HOME = /u01/app/oracle/product/cman1930 CMCTL for Linux: Version 19.0.0.0.0 - Production on 12-JUL-2019 09:23:50 Copyright (c) 1996, 2019, Oracle. All rights reserved. Current instance cman-test is not yet started Connecting to (DESCRIPTION=(address=(protocol=tcp)(host=ocf-cman-1)(port=1521))) Starting Oracle Connection Manager instance cman-test. Please wait... CMAN for Linux: Version 19.0.0.0.0 - Production Status of the Instance ---------------------- Instance name cman-test Version CMAN for Linux: Version 19.0.0.0.0 - Production Start date 12-JUL-2019 09:23:50 Uptime 0 days 0 hr. 0 min. 9 sec Num of gateways started 2 Average Load level 0 Log Level ADMIN Trace Level OFF Instance Config file /u01/app/oracle/product/cman1930/network/admin/cman.ora Instance Log directory /u01/app/oracle/diag/netcman/ocf-cman-1/cman-test/alert Instance Trace directory /u01/app/oracle/diag/netcman/ocf-cman-1/cman-test/trace The command completed successfully. |
Stop should work as well:
|
1 2 3 4 5 6 7 8 9 10 11 12 13 |
$ /u01/app/oracle/scripts/cman_service.sh -o /u01/app/oracle/product/cman1930 -c cman-test -a stop VERSION = 19.3.0.0.0 ORACLE_HOME = /u01/app/oracle/product/cman1930 VERSION = 19.3.0.0.0 ORACLE_HOME = /u01/app/oracle/product/cman1930 CMCTL for Linux: Version 19.0.0.0.0 - Production on 12-JUL-2019 09:28:34 Copyright (c) 1996, 2019, Oracle. All rights reserved. Current instance cman-test is already started Connecting to (DESCRIPTION=(address=(protocol=tcp)(host=ocf-cman-1)(port=1521))) The command completed successfully. |
Add the service in systemctl
|
1 2 3 4 5 6 7 8 9 10 11 12 13 14 15 16 17 18 19 20 21 22 23 24 25 26 27 28 29 30 31 32 33 34 |
# as root: cat <<EOF > /etc/systemd/system/cman-test.service [Unit] Description=CMAN Service for cman-test Documentation=http://www.ludovicocaldara.net/dba/cman-oci-install After=network-online.target [Service] User=oracle Group=oinstall LimitNOFILE=10240 MemoryLimit=8G RestartSec=30s StartLimitInterval=1800s StartLimitBurst=20 ExecStart=/u01/app/oracle/scripts/cman_service.sh -c cman-test -a start -o /u01/app/oracle/product/cman1930 ExecReload=/u01/app/oracle/scripts/cman_service.sh -c cman-test -a reload -o /u01/app/oracle/product/cman1930 ExecStop=/u01/app/oracle/scripts/cman_service.sh -c cman-test -a stop -o /u01/app/oracle/product/cman1930 KillMode=control-group Restart=on-failure Type=forking [Install] WantedBy=multi-user.target Alias=service-cman-test.service EOF /usr/bin/systemctl enable cman-test.service # start /usr/bin/systemctl start cman-test # stop /usr/bin/systemctl stop cman-test |
Open firewall ports
By default, new OL7 images use firewalld. Just open the port 1521 from the public zone:
|
1 2 3 |
# as root: firewall-cmd --permanent --add-port=1521/tcp firewall-cmd --reload |
Bonus: have a smart environment!
|
1 2 3 4 5 6 7 8 9 10 11 12 13 14 15 16 17 18 |
# as root: yum install -y git rlwrap # Connect as oracle sudo su - oracle # Clone this repository git clone https://github.com/ludovicocaldara/COE.git # Enable the profile scripts echo ". ~/COE/profile.sh" >> $HOME/.bash_profile # set the cman1930 home by default: echo "setoh cman1930" >> $HOME/.bash_profile echo "export TNS_ADMIN=/u01/app/oracle/network/admin" >> $HOME/.bash_profile # Load the new profile . ~/.bash_profile |
|
1 2 3 4 5 6 7 |
[root@ocf-cman-1 tmp]# su - oracle Last login: Fri Jul 12 09:49:09 GMT 2019 on pts/0 VERSION = 19.3.0.0.0 ORACLE_HOME = /u01/app/oracle/product/cman1930 # [ oracle@ocf-cman-1:/home/oracle [09:49:54] [19.3.0.0.0 [CLIENT] SID="not set"] 0 ] # # # ahhh, that;s satisfying |
—
Ludo


